

Here's what I do, and it works pretty well for me...
I start by sorting my photos. I group them by the layout they will be going on.

Then I go through my sketch file on the computer. I have them sorted into folders by how many pics are on the LO, 1 pic, 2 pics, etc. Ok, this next part makes perfect sense to me, so hopefully I can explain it! I go through my photos and pick the first group. If it has 4 photos, I go to my '4 photos' file and pick a sketch I like. I 'copy' the sketch file and 'paste' it into a new folder on my computer, this one I called "April 2010 Retreat". I rename the sketch to '#1', and then repeat until I am done with my pics. I have 54 sketches and 54 groups of pics, and that is my goal for the retreat.
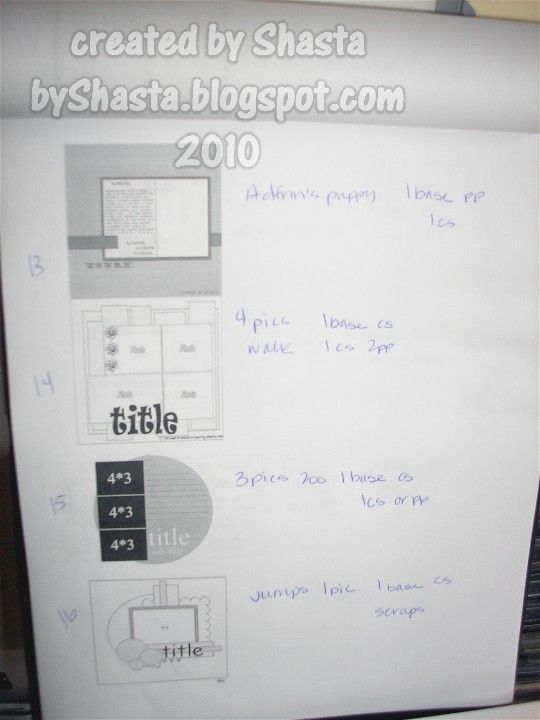
Once I have all the sketches picked out and in the new folder, I print them out. What works best for me is to print them four on a page, going down one side. Then I have room for the next step, which is to write down what is in the pics and how many papers I need. I write down how many patterened papers (pp) and how much cardstock (cs) I need for each LO.
Then the fun begins! I set up right next to my papers with the supplies I need. I have my clipboard with the printed sketches and all my notes, a pen and a pad of Post-It notes, paperclips, and a box to put my completed 'page kits' in.
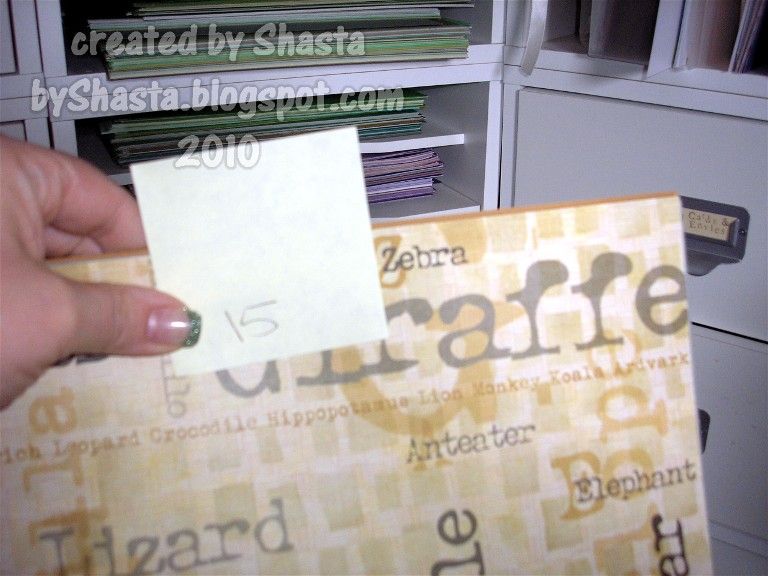
Starting with my first group of photos, I check my clipboard and see what sketch goes with them. My notes next to the sketch say how many papers I need, so I look at my photos and decide what color/theme the papers are going to be. For this one, I needed two sheets of cs, and one pp.
Same for this one.
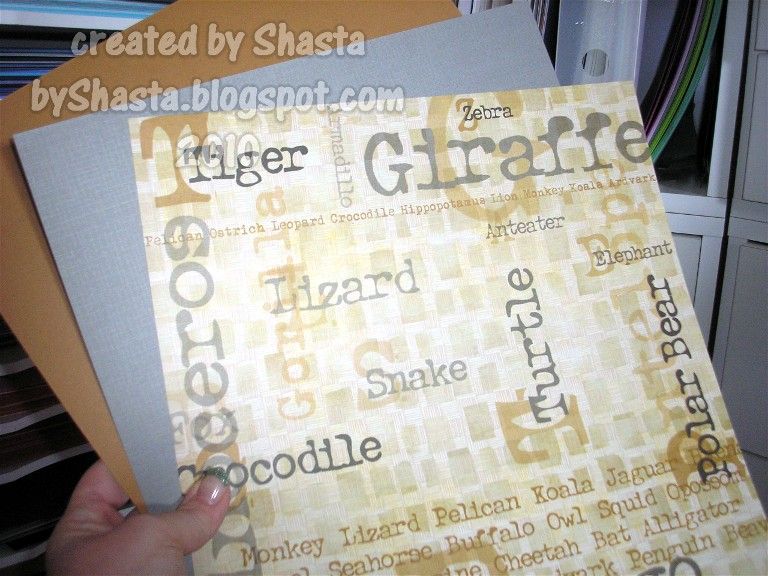
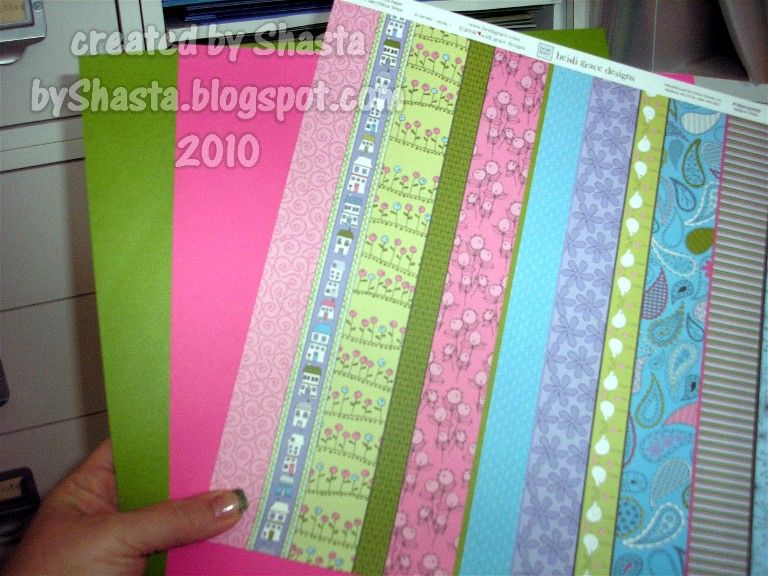
Once I pick out my papers, I label them with a Post-It and the coresponding sketch number. I make sure the sticky part of the note is along the side, so when I fold it over it grips the front and back of the group of papers. If I have a certain tag or other embellie to use with the papers, I include it, and put a paperclip over the sticky note. If it is just the papers, I don't put a paperclip.
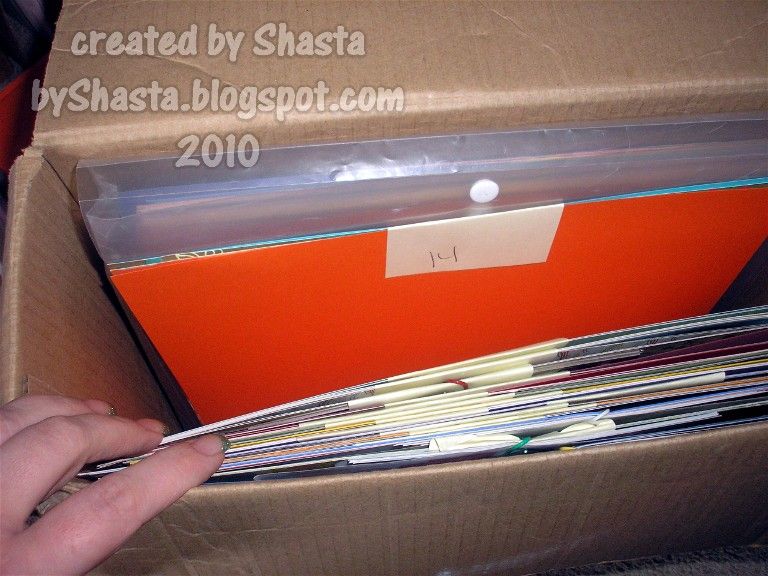
Then into the box it goes. This box is totally random, but about 3 years ago I started using it becase it was the only thing I had the right size. All the 12x12 containers I had were either too small or too big, so I still just use this box. It sits right next to me on the floor at the retreat, and I just reach down and grab the next set of papers when I finish a LO.

Phew, ok! So as I am typing this out and going through my step-by-step process, it has occured to me that it sounds a mite anal! Oh well ;) It works for me, and I am able to get a lot done.
Like I said, the process of getting started is the hard part for me. This way I just grab and go, and I hit the ground running. Once I have a clear jumping-off point (the sketches), I can start creating. Also, I don't have to decide what papers to pack and then consequently waste time deciding which ones to use. That part of the equation is already completed and I can focus on the fun part, creating something meaningful and pretty ;) Almost everytime I go to one of these retreats, I have a few of these LO kits that don't quite 'work' for me when I am there, but that's ok. It is maybe only 3 or 4, so overall it is a pretty efficient way to get organized. For me is anyway ;)
This sounds like a lot of work, and it is, but it is easily broken down into bite-sized pieces. I don't do it all at once! Sorting the pics is pretty quick and doesn't take a lot of time. I typically do this in the evenings after the kids go to bed, and my hubs and I are watching a program or two. I think it only took one night to sort them. Then probably 4-5 nights of picking sketches to go with the pics. I have my laptop in the livingroom so I can do a bit of mulit-tasking ;) Once that is done, printing them out takes only a few minutes and another night or 2 of writing notes along side of them. The part that takes the longest is sitting down and pulling the papers together. That is why I start now! I have a little less than 4 weeks until the retreat, so I want to make sure I have enough time to finish the pre-planning part and then start packing.
Once I get all that done, packing the rest is a cinch. I bring my tools, a stack of extra cardstock for matting and cutting titles, and whatever embellies I need.
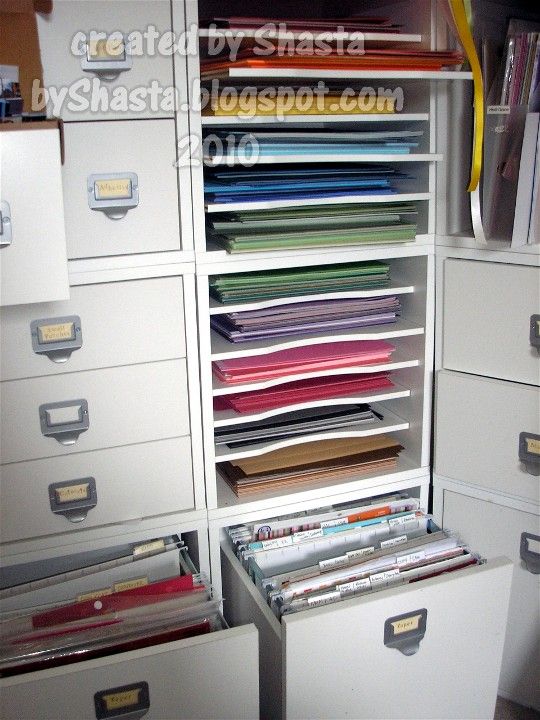
For tools, this includes my Cricut and cartridges, other cutting tools like a craft knife, circle cutter, etc., Cuttlebug and dies/folders/plates, stamps, blocks and ink pads, cutting and craft mat, adhesive and refills, and all that stuff. For extra cardstock, I bring an assortment of 12x12 sheets in black, white, and a bunch of different colors, plus a ton of the mat stacks from DCWV. I love the ones that are 4.5 x 6.5, because they are perfect for punching, die cutting and cutting titles on Cricut, and I can pack a lot of different colors in a smaller space.
As for embellies... Well this is where I get a little carried away! Just ask anyone who has been to a retreat with me ;) But I can, because I was so efficient in packing my paper, so now I have LOTS of extra room for the fun stuff! I bring pretty much anything I think I will use. Letter stickers, Thickers, ribbon, bling, felt, brads, you name it. This is where my creative process comes in. I took all the spontaneous elements out of the equation by pre-planning my paper choices, so now I need room to groove with my embellie choices. This is where I take my time to decide what to use, so I bring it all. I bring all my ribbon, all my brads and eyelets, all my flowers. ...And I have a lot of flowers, don't I ladies??
Yep, all of it. I can't help myself, and I know that if I didn't do it this way, I would be wishing I would have brought that one thing I need to finish my page. I even bring a small shelving unit to put behind me so I can easily access my supplies and have everything in reach. I use one of the wire cube shelf sets I got at Target for like $15. The unassembled sets are pretty cheap! I can put it together in about 10 minutes, so it is super portable and convenient to use. A few of the regular ladies I retreat with have taken to doing the same thing ;) Space is pretty limited so I make the most of it, and there is nothing worse than having to dig through a bunch of stuff to find that one thing you need!
So there is a peek into my process, hope it helps someone ;)


That's how I prepare for retreats, too! People think it's too much work to prepare like that, but for me it's a necessity because there is just no way possible for me to bring all of my paper and CS along. And like you said, it leaves plenty of room for all of the embellies that I want to bring along.
ReplyDeleteHope you get a lot done!!
I LOVE THIS and am going to use the heck out of it! The hardest part for me is to get started to and this is just so awesome! THANK YOU THANK YOU THANK YOU. and a big hug. Makes it all seem less stressful and alot more fun. ~Theresa
ReplyDeletewow, I need to get with you sometime to scrap, you can get it done this way, great tips...have a wonderful time and a fantastic weekend!
ReplyDeleteenjoy *~*
Thank you so much for sharing. I'm planning to attend a weekend crop at the end of this month and am looking for tips to pack efficiently. I never get much done away from "my space" so hope to be able to do more this time and pack better. I always pack either too much that I'm overwhelmed (as is everyone else around me) or not enough that I feel unmotivated. I'm even considering just working on one may project instead but have so many pics to do. ??
ReplyDeleteohhhh helpful!! Im just about to go on my first - good timing!
ReplyDelete