Sunday, October 4, 2015

Stack the Deck 6x6 album **SOLD**

So I have had this collection of papers and doodads for a while and wanted to make something, but I didn't know what..  Then I happened along this tutorial a few days ago!  I knew I had to try it and knew exactly the papers I wanted to use.  This Stack the Deck binding technique is very simple and easy, with great looking results.  I grabbed a few pieces of matching cardstock to go with this Basic Grey 6x6 pad and away I went.


I made the cover out of three pieces of chipboard that I cut to the size I wanted, slightly larger than the 6x6 pages.  The envelopes I used are for 5x7 greeting cards, so 5.5x7.5 I think, and I just cut them to 6.25" long.  I did this assembly line style, meaning I pre-cut all the layers and flaps first, and then just randomly put them down on the pages.  It was pretty quick to put together once everything was assembled.

 photo 20151003_184838_zps3dvd0a2r.jpg

 photo 20151003_185141_zpsycsduofg.jpg

 photo 20151003_185151_zps9dvkkmpe.jpg

 photo 20151003_184919_zpsimic7mgq.jpg

 photo 20151003_185049_zpsef7y1205.jpg

 photo 20151003_184937_zpsbyafx6k4.jpg

 photo 20151003_184949_zpsecdnajv0.jpg

 photo 20151003_184959_zpsbuaube8v.jpg

 photo 20151003_185014_zpsyxjrosof.jpg

 photo 20151003_185039_zpsypb6k2sb.jpg

 photo 20151003_185119_zps98h5vboq.jpg

 photo 20151003_185128_zpsefed9ajc.jpg

Tuesday, September 15, 2015

Beach wedding mini album 8x8

One of my good friends is getting married on a beach in Mexico in November 2015, and I wanted to make her something special. The colors of their wedding are fuchsia and teal, and they're new last name begins with "Z".  I am quite happy to say that I purchased nothing new for this, and used only products I had on hand.

I couldn't find any papers that suited my needs, so I made my own.  I grabbed miscellaneous sheets of fuchsia, teal, black, white and craft cardstock, some stamps and 3 colors of ink.  I used Tim Holtz Distress Inks in Peacock Feather, Picked Raspberry and Tea Dye.  The stamps were a hodge podge of what I have. Some are large background wooden and rubber blocks, and some are a cluster of smaller ones mounted on one clear block.  I know the clocks are by Heidi Swapp, the seashells and feathers are Hero Arts, the leaves and flourishes are Papertrey Ink, the large butterfly is the Swallowtail from Stampin Up, the heart is a dollar stamp from Michael's (I think) and the birds and the film strip are by Tim Holtz.  The rest, well who knows!  After all the pages were complete, I adhered them to 8x8 pieces of chipboard.

I lightly tacked down the 4x6 pieces of black cardstock so they can be removed easily and replaced with photos.  I bound it with three locking book rings and tied coordinating ribbons on them.  The heart and the "Z" on the front were cut on my Cricut, and the "Z" is topped with Glossy Accents.  The pearls are a sheet of the Recollections brand from Michael's, they are awesome and I just cut them into strips.  The rest of the paper was cut into blocks and strips, and I think I only used 4 punches.  The large heart is Fiskars I believe, the label and border punch is EK Success, and then a miscellaneous circle one.

I can't wait to give it to her!


 photo 20150915_102110_zps5vilufnx.jpg
 photo 20150915_102131_zpscp3hip18.jpg
 photo 20150915_102143_zpsagtmmwv4.jpg
 photo 20150915_102151_zpswzpqzj7m.jpg
 photo 20150915_102201_zpsyzjizbld.jpg
 photo 20150915_102213_zpsf7za070w.jpg
 photo 20150915_102233_zpszpekwwlm.jpg
 photo 20150915_102243_zpsoxjf9dki.jpg
 photo 20150915_102251_zpsqvplwjzc.jpg
 photo 20150915_102303_zpszamoythe.jpg

Tuesday, June 23, 2015

Swallowtail by Stampin Up!

I just got this stamp just a few days ago from my friend Kim and have already put it to good use!  Most of these are lifts of another card, by technique or by material, that I see on Pinterest and I am not really good at keeping track...

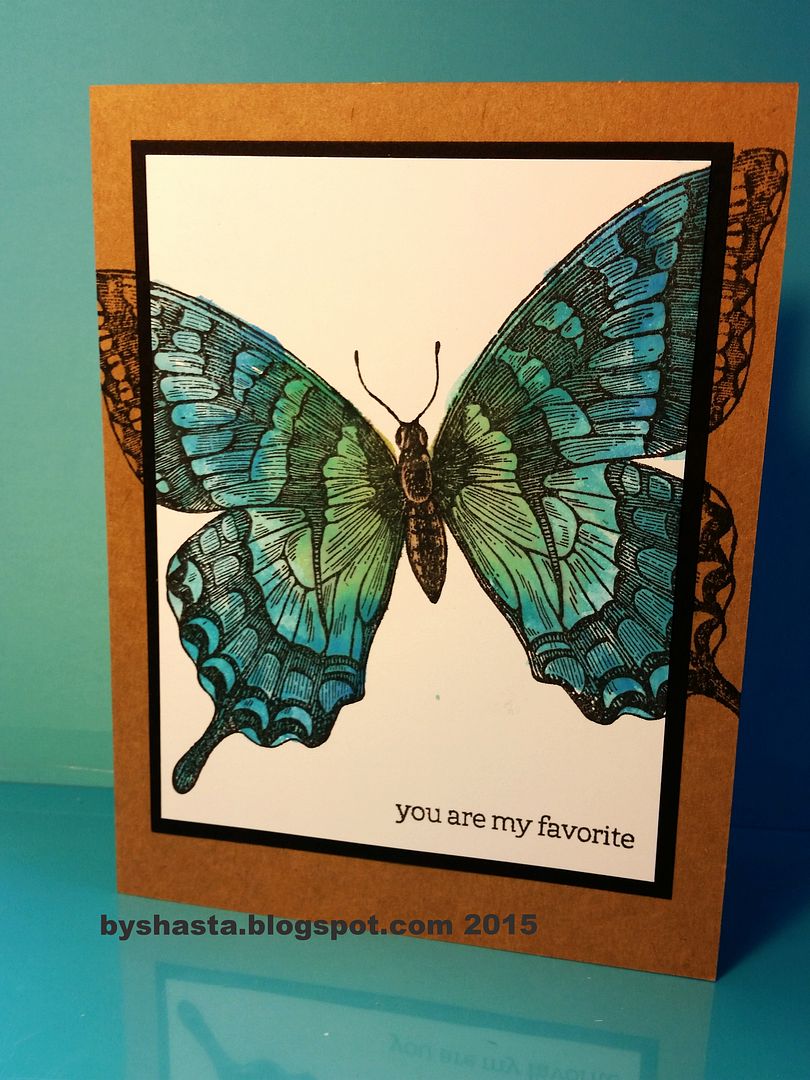
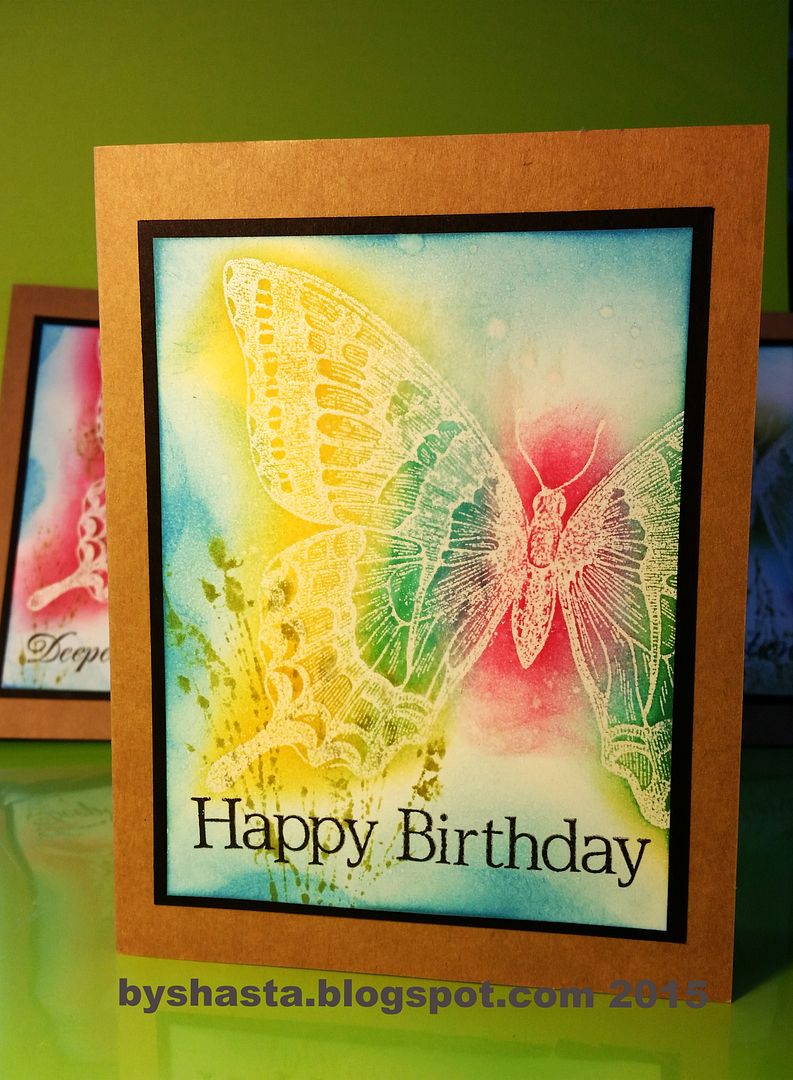
This one I stamped in Memento Tuxedo Black, and used Distress Inks with water to color the image. I stamped the white cardstock layer and card base at the same time, then added the black layer.

 photo 20150623_132400_zps7dzjzz3w.jpg


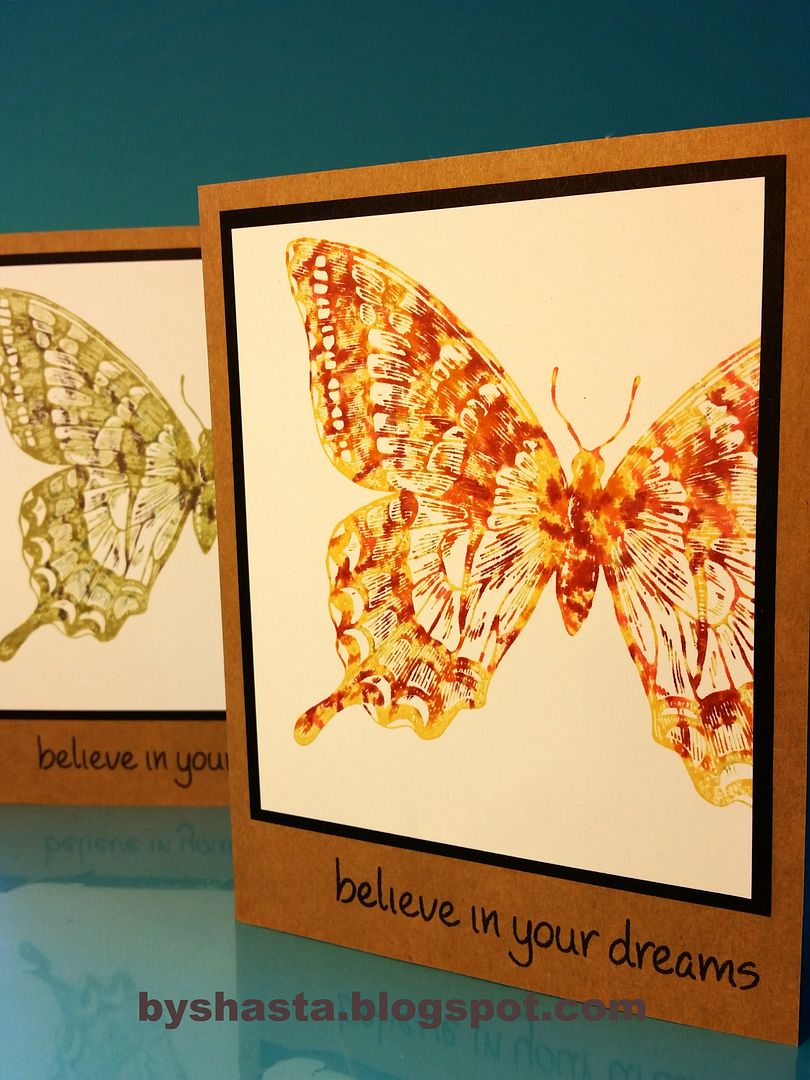
This one I inked up the stamp with Distress Markers, spritzed with water and then stamped.
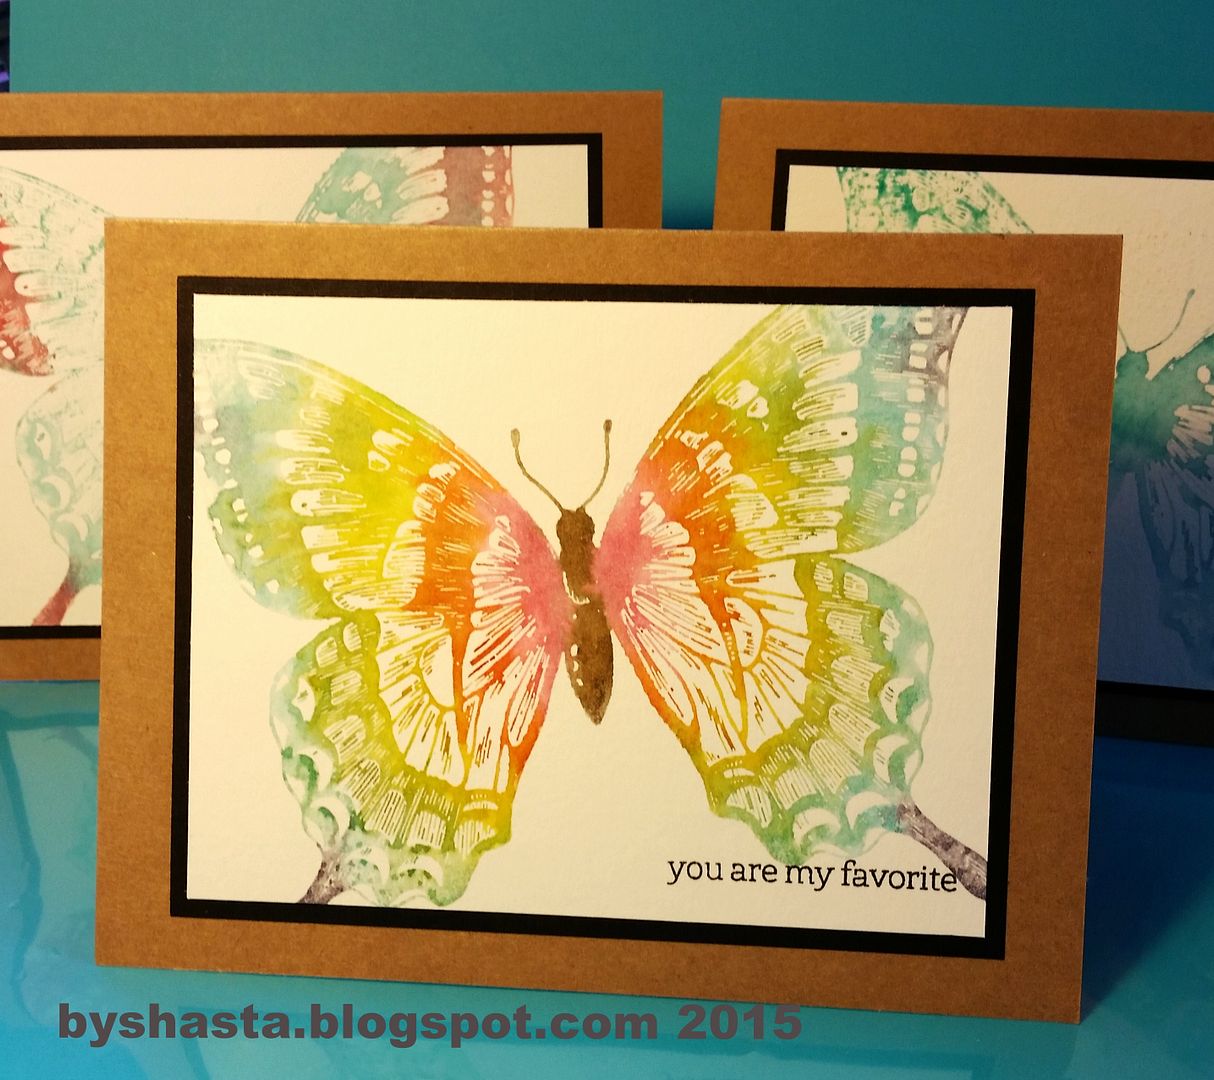
 photo 20150623_132249_zpsk2i4qmze.jpg


This is the thumping technique, which is pretty simple but has a complicated looking effect.  I thought mine wouldn't turn out that well but I was pleasantly surprised!  Basically you ink up your stamp and then thump 3 or 4 coordinating colored markers all over the image and then stamp. I used a light colored Memento ink and Distress Markers, going from lightest to darkest.  Easy peasy!

 photo 20150623_132157_zpsipbsuueq.jpg


For this one I used clear embossing ink and powder on white cardstock first, then used Distress Inks and the blending tool to ink over the design in varying colors, or embossed resist as it is called.  I spritzed it with water at the end for the light dusting of water splotches.

 photo 20150623_131955_zpswizuwzia.jpg


This one was kind of a fail at what I was attempting, but it turned out ok.  It is a single layer card and I used the embossed resist technique as well.  I wanted to color in the design with Distress Markers, which I did, and then wipe it off for a clean finish.  Well, when I wiped it off the ink smeared.  So I just went with it and smeared it all. Not what I intended, but...!,

 photo 20150623_131859_zps2iebsaq0.jpg


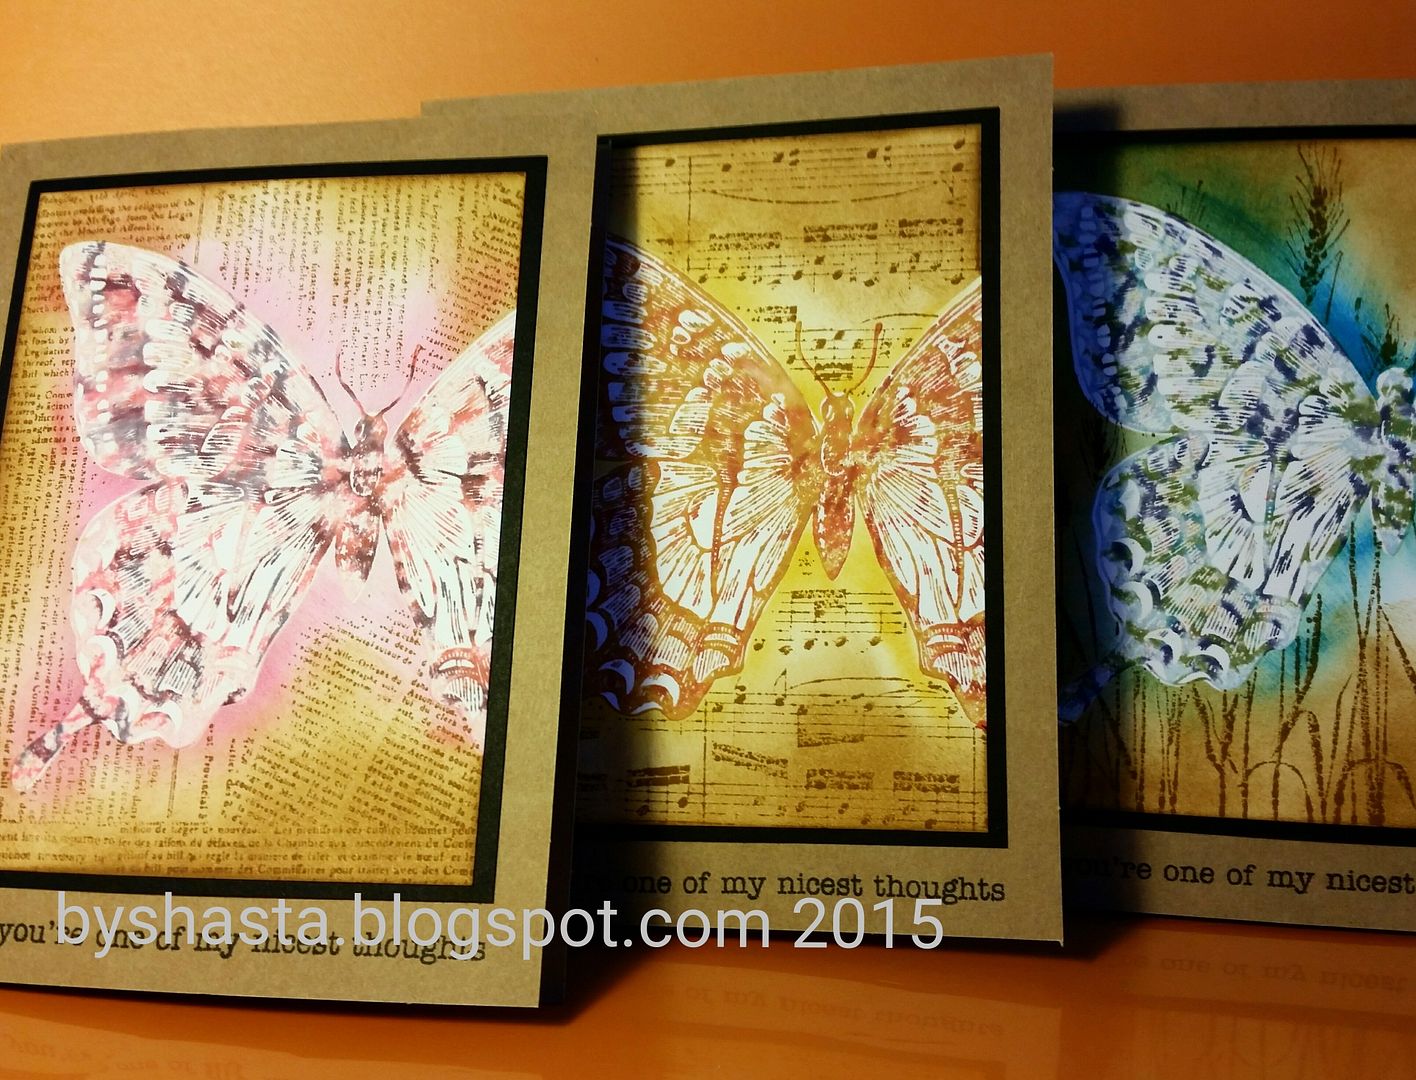
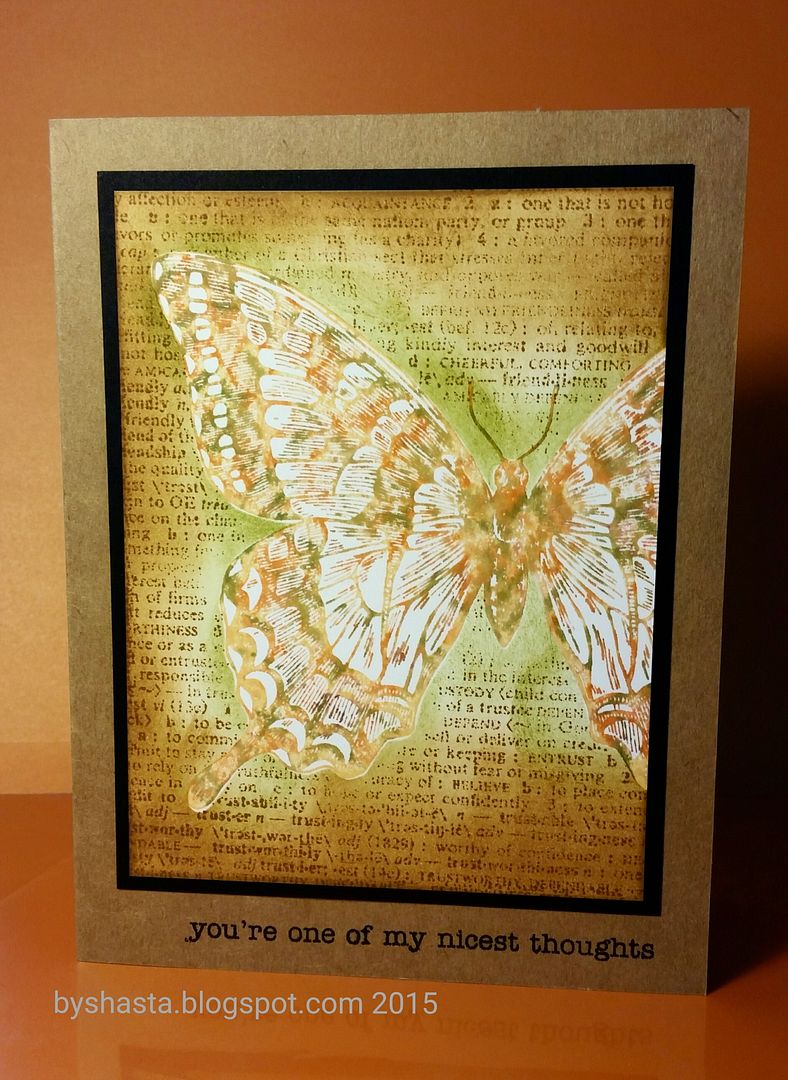
These ones have a lot going on.  I first stamped the image using the thumping technique the same as before, then I used a mask of the same image and stamped the backgrounds over the top so the butterfly would remain clear.  The brown of the background images, the music and wheat and text, was a bit harsh next to the butterfly, so I decided to do the backgrounds a little differently.  I put the butterfly mask back down and inked each image with a similar color around the edges, and then softened the whole thing with a little bit of brown.

 photo 20150623_131707_zpsr8uxlxwv_edit_1435092437622_zpsgpsfxn8f.jpg


 photo 20150623_131641_zpshjygpomt_edit_1435092152767_zpsmrltfrqp.jpg


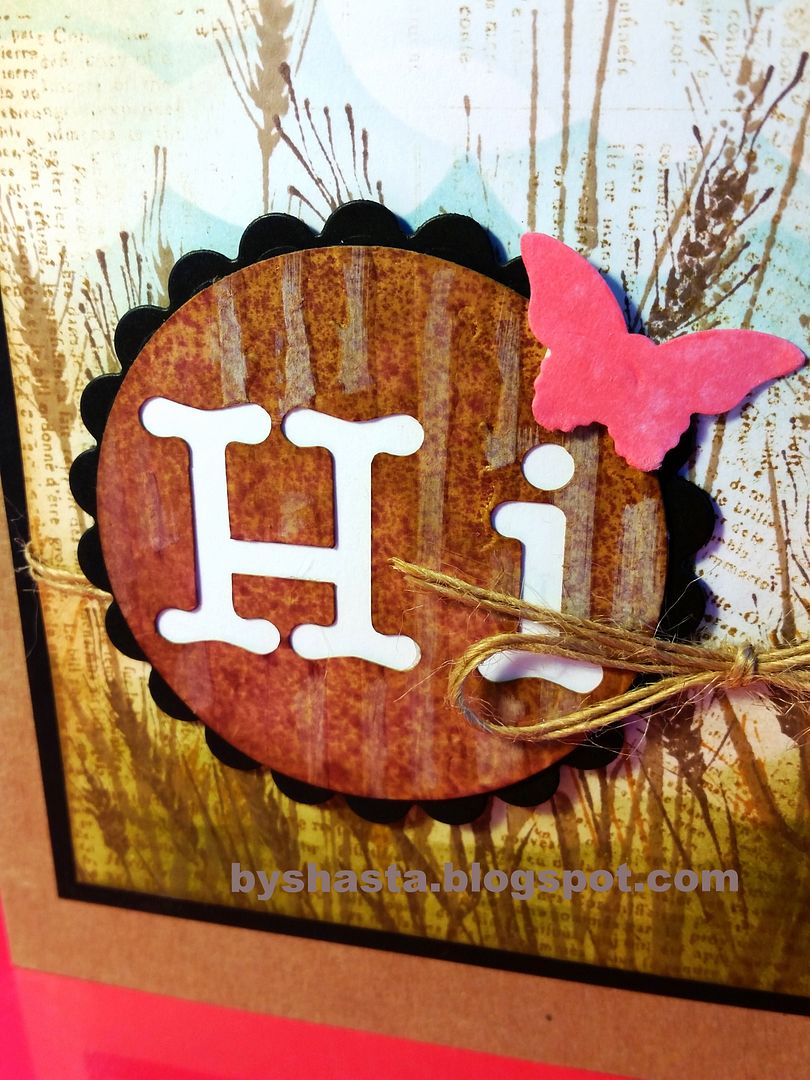
This one is my favorite, and an entire creation of my own.  I started out by seeing another card with the clouds and grass done with Distress Inks and a simple paper mask.  I tore two ends of a piece of paper in a loosely straight line for the grass, and then cut scallops on two ends of another scrap for the clouds.  I inked each end with the blending tool and Distress Inks in varying layers in blue and green for the grass and sky, and then used the wheat background stamp over the top in varying shades of brown Memento Inks.  I had no idea where this card was going, and was just creating backgrounds to see how they looked.  At first I had thought of putting some sort of sign or fence post to hold a greeting, because something wood grain seemed appropriate, but that would cover up too much of the pretty background.  I decided to use a die cut greeting, but none of the ones I had would fit, being as they were too large.  I recently Got a Cricut Explore machine and have used it exactly zero times, so I can't even tell you what I cut.  I pushed the add text button and typed "Hi."  I have no idea what font it is, and just sized it to fit 4 on a sheet with enough room to be die cut later.  The brown part is the die cut, the negative of the letters.  It started out as white cardstock, which I ran through my Cuttlebug.  First with a circle die and then with the wood grain embossing folder, and then heavily inked up with Distress Inks in Frayed Burlap.

 photo 20150623_131745_zps2dzhrhda.jpg


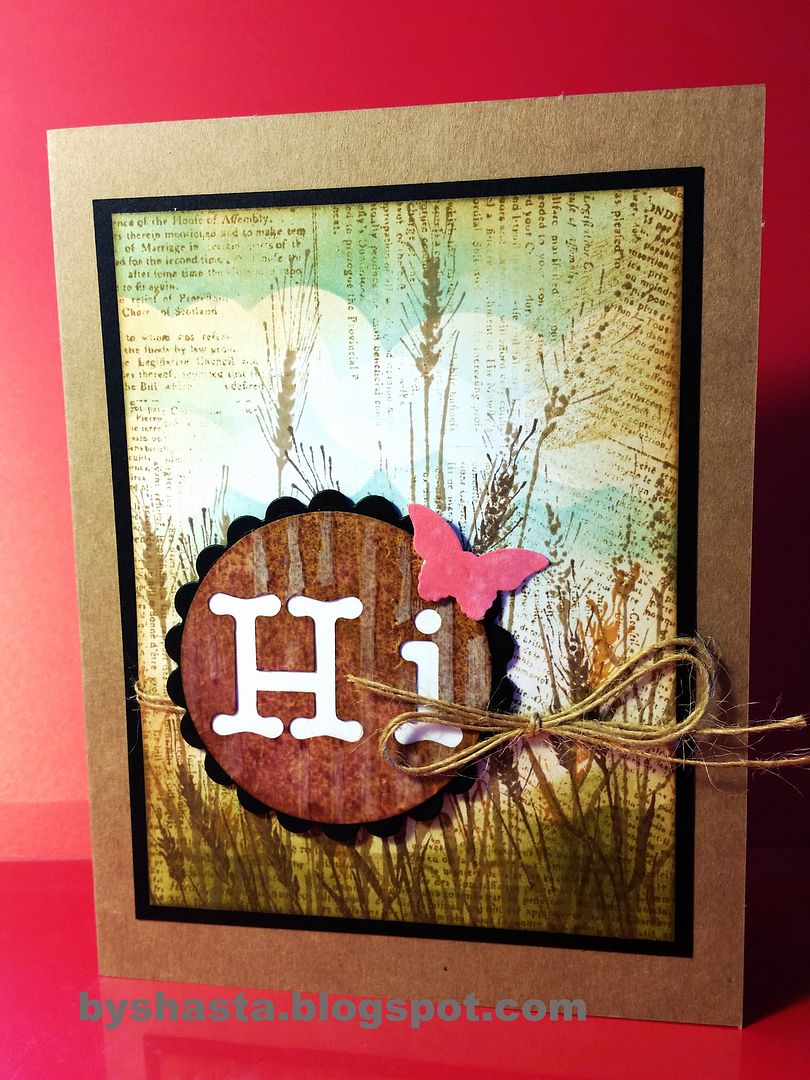
After all that I sprayed it with water, and then with an Adirondack color wash spray in Raisin I think. When it dried, I used the white Distress Marker on the raised areas, and then put a piece of white cardstock underneath.  The little butterfly is a Stampin Up punch, and the color is Worn Lipstick Distress Ink on white cardstock.  I inked the scrap of paper, sprayed it with water to make it splotchy, and punched it out after it dried.  This card was by far more labor intensive than the rest, taking about 2 hours to make 4, but turned out so pretty!

 photo 20150623_131755_zpsybfepdy0.jpg

Thursday, February 12, 2015

Love Themed Paperbag Album

I have to admit, I love making these!  They're so much fun, and super easy.    I started by buying a bulk selection of bags at my local restaurant supply store.  I took along a 6x6 piece of paper to select the right size when these bags are folded in half.  I think I spent like $30 on 500 bags.  They even had white ones too!  Most of the papers I used were from the Immortal DCWV stacks, with a couple other miscellaneous ones thrown in.

I picked three bags and put them together with the ends alternating directions, and then used my sewing machine to stitch them right down the middle to create the binding.  All the flowers I inked using Tim Holtz Distress Inks and Glimmer Mist, and I inked the paper edges with Distress Inks as well.

 photo 20140224_180352_zpsdsnpno3_edit_1395354123024_zpsglqribw_edit_1395355819331_zpseqfjlwie.jpg


 photo 20140224_180423_zpsfpjacbs_edit_1395354193939_zpsxg8yta4_edit_1395355777845_zpswybdxin9.jpg


 photo 20140224_180440_zpsz7sddfb_edit_1395354220381_zpsiguvxug_edit_1395355745264_zpsvxo0lqqf.jpg


 photo 20140224_180500_zpsruyxskn_edit_1395354263178_zpsyeqagun_edit_1395355700688_zpsdvcwbopf.jpg


 photo 20140224_180530_zpsusly3fr_edit_1395354386436_zpsk4big3z_edit_1395355642766_zpsz54coz0a.jpg


 photo 20140224_180559_zpswcyh8yx_edit_1395354486736_zpsx7lta2w_edit_1395355590522_zps6qrzx2zw.jpg


 photo 20140224_180613_zpsxfbo3vr_edit_1395354523099_zpsbfmcuer_edit_1395355543532_zpszn6x55xg.jpg


 photo 20140224_180620_zpsa2i1yz4_edit_1395354564436_zps7rigwsr_edit_1395355499639_zpsinb2llqp.jpg


 photo 20140224_180634_zpsbbhqnob_edit_1395354613291_zpsfsmvina_edit_1395355422722_zps0oxy0x7d.jpg


 photo 20140224_180613_zpsxfbo3vr_edit_1395354821998_zpsc2lhlub_edit_1395355327766_zps0m9kt5ie.jpg


 photo 20140224_180620_zpsa2i1yz4_edit_1395354866523_zpsbmpuu4r_edit_1395355252843_zpsqxsenaix.jpg


 photo 20140224_180634_zpsbbhqnob_edit_1395354902449_zpslbi5c8w_edit_1395355203330_zpsqqpskpt0.jpg


 photo 20140224_180711_zpswmfmtgb_edit_1395354949793_zpsx4txts1_edit_1395355002559_zps4yd6aacw.jpg