Friday, June 25, 2010

Cards and a box...

I have been reading this blog called "Wizard's Hangout" for a while, and was inspired by all the boxes she makes!  I winged it on the dimensions, so no measurements for you, sorry.  I used an 8 1/2" by 11" sheet of white cardstock for the base and part of another for the lid.  I basically figured my envies were going to be the standard 5 1/2" by 4 1/4" and I wanted it to be 1" deep, so made the template to fit.  The lid was made with the same measurements, only adding an 1/8" to make it slip over the top of the base.

I also am just so in love with this stamp set from PTI, "Turning a New Leaf" and keep wanting to use it over and over again.

Also these little flowers are so cute and easy to make, and I made a bunch.  I found a free printable poem online, and changed the font to something swirly, called Vivaldi.  I put it in Works, and kept copy and pasting until it filled the page, and also changed the margins so it printed as close to the edges as I could make it.  The last thing was to justify the edges so it was even all the way down both the right and left margins.  I was able to cut 15 scallops on each piece of paper using a 2" scallop punch, and each flower used 4 layers.  The felt is just free-hand cut into leaf shapes.  Then I stapled the flower layers and leaves together with Tim Holtz's Tiny Attacher, love that thing!

Photobucket

Photobucket

I used a new (to me anyways!) Martha Stewart border punch, and a sentiment set from Hero Arts for the greetings.

Photobucket

Photobucket

Photobucket

Photobucket


Recipe:

twine:  Papertrey Ink
stamps: Papertrey Ink, Turning a New Leaf
ink:  ColorBox Chalk ink in French Blue, Memento in Tuxedo Black
cardstock:  Neenah Solar White,
punch:  Martha Stewart, Double Loops
misc:  felt, black cardstock, buttons, black ribbon

Wednesday, June 16, 2010

Teacher's Gift

I made this little 'purse' for my daughter's Kindergarten teacher.  I almost kept it, it turned out so nice!  I have been admiring THESE cards by Jennifer McGuire forever, and I ordered the stamp set for it just to make them.  I found the purse here, but modified it to fit my cards, which are 5x7.

Photobucket

Photobucket

Photobucket

Photobucket

I made the box out of a 12x12 piece of cream cardstock, and then stamped the leaves all over it.  I used the same pattern as the link above, just changed the measurements to fit my cards.  The score lines are at 2" and 10" on one side, and at 5" and 7" on the other side.  The 3 green pieces (two end flaps and enclosure flap) are all 8" x 2", and the 2 ribbon pieces are approximately 14" long.  I used a 2 inch circle punch and a slightly larger scallop punch for the medallion, and another PTI set for the loopy border.

Now on to the cards!  Some of the handmade flowers I already had, some I made on Monday afternoon.  I had fun hunting for just the right crocheted flower tutorials, and ended up finding a few that I liked.

These pink felt flowers are from a PTI die set, Beautiful Blooms #2, and then I sewed the pearl beads on.  The purple crocheted one is from here.  I loved this video tutorial because it went step by step, and I was able to pause it and do a few stitches, and then watch some more.   Very good tutorials, and she has LOTS of them.  If you are familiar with crocheting and know what the stitches are, then you can follow along very easily.  If not, then she has lots of videos showing stitches too!  The fabric flower is cut with the same PTI die set (3 layers of the largest flower) from some fabric scraps I got at Joann's ages ago.

Photobucket

Photobucket

This crocheted flower is from here, the 4th pic down (Coreopsis Flower), and the felt pink one is another PTI die, Beautiful Blooms #3.  The orange one is the first one of these I made with some scraps, and glued some pearls into the center.
Photobucket

These two crocheted flowers were from the same tutorial as above, but I added a 6th petal to the white/pink one.  The other one is also one I had leftover from another project.

Photobucket

This orange one is from this tutorial, and the pink one was from the one above.  The felt one is another PTI die, Beautiful Blooms #1.

Photobucket

Photobucket

The leaves were all stamped with Memento Ink, Bamboo Leaves.  The sentiments were from 3 different sets, these, these, and these.

Sunday, June 13, 2010

Yummy breakfast 'muffins'

I have been trying to introduce my husband to this thing called nutrition, and it is a slow, slow process.  He loves all things bad for you, like chips, top ramen, snack stuff.  He will willingly eat good stuff if I cook it and put it in front of him without much complaint, but when he is left to make the choices himself?  Well let's just say he reverts to his old habits! 

He works very early and gets up around 3:45 AM to be at work by 5 AM, so he is long gone by the time I wake up in the morning.  I can't tell you how many times I have walked into the kitchen to find a plate in the sink with the remnants of a corn dog and tater tots, or fish sticks, or macaroni salad, or something else bizarre to eat at 4 AM!  He would rather cook this in the microwave than make a bowl of cereal, or toast, and egg or two, or oatmeal, which is what I typically have.

I had a chat with him this morning over breakfast, which was yummy breakfast burritos, love them!  I told him I have been noticing his breakfast dishes in the sink.  ...And with neither of us getting any younger, maybe he should make better breakfast choices?  Oh, and by the way Honey, I love you ;)  I got nothing other than what I expected, however.  A slight narrowing of the eyes looking at me from over the rim of his raised coffee cup, which was stopped half way towards his mouth, lol. 

But, after 17 years together, we are pretty much past the "I can't say what I really mean because it makes us uncomfortable" types of conversations, and are more into the "this may sting a bit, but I say this out of love" types instead.  After all we're both grown-ups, right...?  I know he wasn't exactly thrilled with this topic, but he is smart enough to realize that #1, it's the truth, #2, it's a good idea, and lastly #3, I am right ;)
Sadly, knowing all this he was not happy with the options I provided him!  So after having a lazy Sunday and going through the fridge this evening pulling out the leftovers for dinner, I had an idea.  We had some leftover ground spicy breakfast sausage from this mornings burritos, a few slices of bacon from yesterdays BLT's, and we just bought a bunch of eggs today.  The perfect fixings for a yummy breakfast!  Plus, my friend Tammy and her teenage daughter had been making a breakfast casserole on the weekends to eat all week long, when they are in a hurry and running out the door in the mornings.  Have you ever seen these on Rachael Ray's TV show?  I loved the idea, and have wanted to try them, but just never got around to it, so that was my inspiration.  Simple, portion-controlled, and yummy, perfect!

I tossed a couple chopped potatoes in the micro, and started sauteing an onion on the stove.  When the potatoes were mostly cooked, I added them to the pan to brown them a bit, and added some salt, pepper and garlic.  I layered the potato and onion mixture first, added some thawed and drained chopped spinach, then the leftover sausage and chopped bacon.

Photobucket

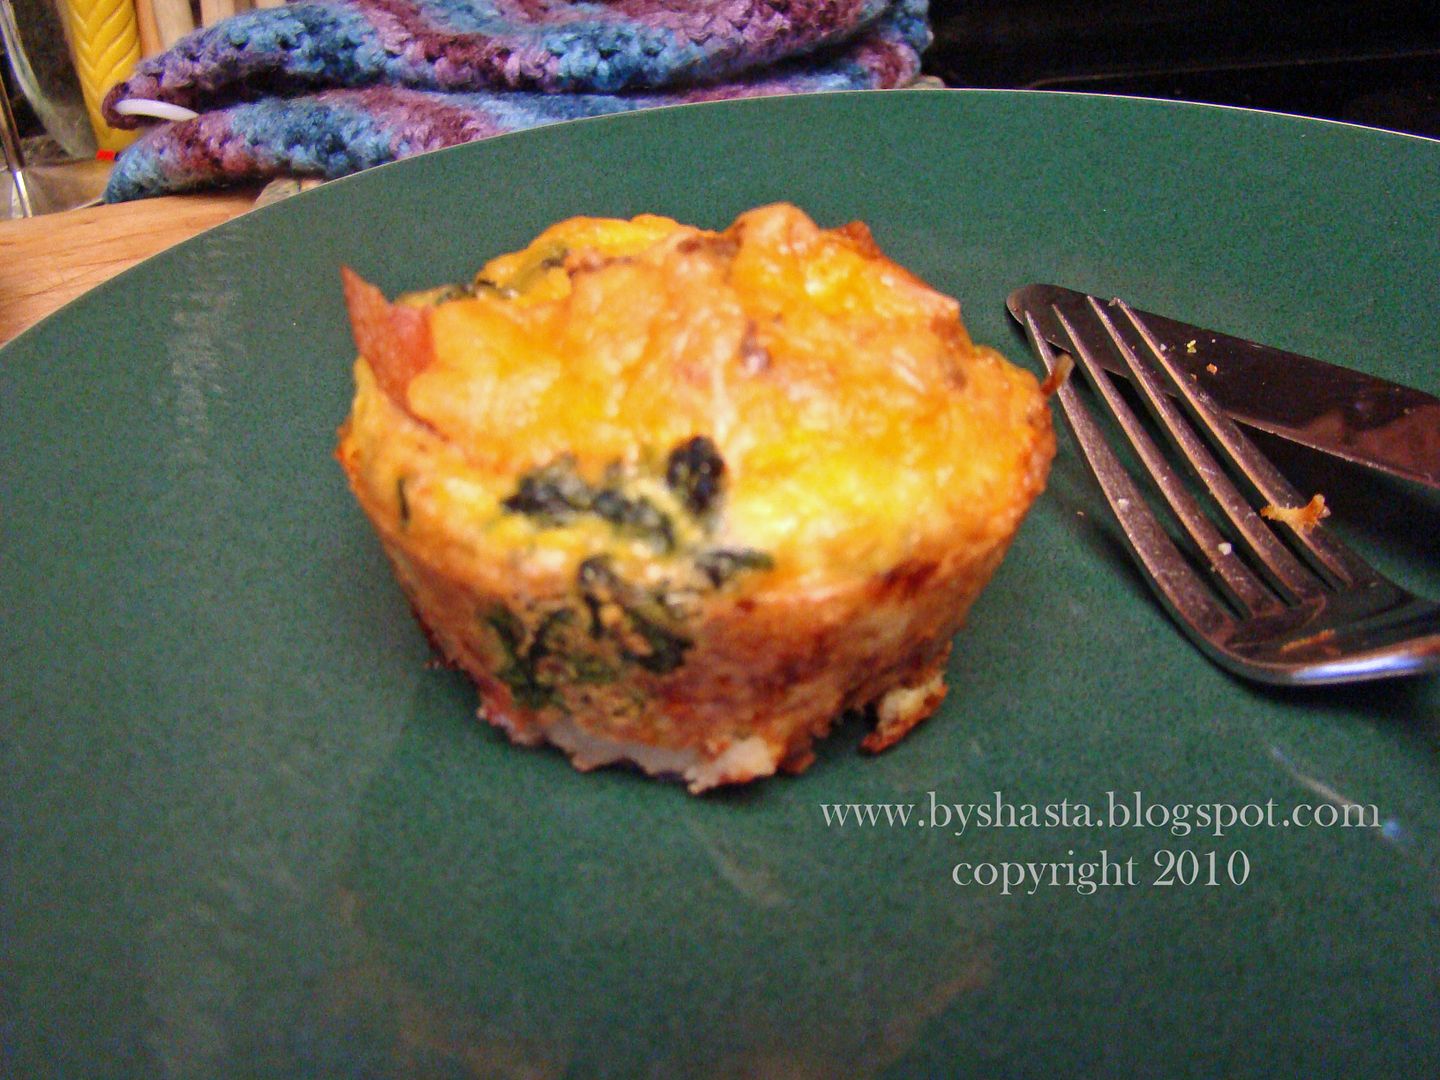
I topped it off with a bit of shredded cheddar cheese, and then poured on the eggs.  I mixed up 18 eggs and had enough stuff to fill my muffin tin twice!

Photobucket

They baked for 30 minutes at 375 degrees, and were done perfectly.  Aren't they pretty??

Photobucket

Now my wonderful husband has 24 of these babies to keep him from going hungry at 4 AM.  Should last him for a few days ;)

Photobucket

Thursday, June 10, 2010

Blog candy!


On Kathy's blog HERE!

Saturday, June 5, 2010

Cute little craft!

These first pics aren't so hot, because they are from my phone, but Adrian is such a cutie pie even in bad pics ;)

She asked me today why she didn't have any headbands, so I whipped one up.  I had a few fat quarters of fabric that all matched, so I used three pieces.  One for the flower, for the leaves, and for the band.  I don't have any specific measurements, because I just free-handed it all ;)  I will try to describe it as best I can!


Photobucket

Photobucket

Photobucket

This one is better, I took it on my regular camera.
Photobucket

Flower:

I cut a strip about 4 x 11, and folded it in half so I ended up with a long strip (roughly 2 x 11, wrong sides out). I sewed along one short end, down a long end, and then down the last short end, and folded it right side out, and top-stitched over the same 3 sides again. Then I used a needle and thread and put a wide gathering stitch in the raw edge, and pulled it tight and added a few stitches to secure it. I hot glued the button on top, and all done!
Leaves:
I cut 3 leaf shapes out of 2 pieces of fabric placed back to back wrong side out, and sewed along the sides leaving the bottom edge open. Then turn them right side out and top-stitched the same sides, and then gathered and secured the raw edge, just like the flower.

Headband:
This one was a little tricky! I cut 2 strips of fabric off the end of the fat quarter about 2 inches wide. They ended being roughly 2 x 11, and I sewed them together to make one long strip. This was approx 2 x 22, and then folded it in half (wrong side out) to make a 1 x 22 inch strip, and sewed along the raw edges to make a tube. I had a little trouble turning it inside out, but my hubs saved the day!  He went out to his garage and finding me a piece of wire about as thick as a coat hanger and made the end hooked for me. It worked great! I fed the wire through the tube, then hooked the fabric on the end hook, and slowly pulled it right side out.
Assembly:
So all the parts were done, and the elastic was the only thing I really measured, and I just wrapped it around Adrian's head and cut. No idea how long it was! I put a safety pin on the end of the elastic and fed it through the tube, and then sewed then ends together by hand. Once they were sewn, I let the tube kind of adjust itself around the elastic, and then just hid the to raw ends of the tube right under the flower that I sewed on last, easy peasy!

Tuesday, June 1, 2010

My latest flower creations!

How do you turn plain white cardstock into gorgeous flowers?  Let me show ya!  I found these VIDEOS the other day, and I used the technique in the second one, since I don't have any Glimmer Mist.  I cut a bunch of flowers using my Cricut and the George cartridge (the flower on the bottom row almost to the end, with the shift button and the shadow blackout button pushed), enough to make 12 flowers.  So 24 large, 24 medium, and 12 small shapes. 

I colored them using Tim Holtz distress inks, 2-3 colors of ink per flower.  After spreading the ink directly on a craft sheet and spraying water mixed with Perfect Pearls powder, I just swiped the flowers around in the mix.  This is what they looked like after I crumpled them up and let them dry.


Photobucket

Photobucket

I assembled them and put either pearl beads or rinestones in the middle, and here they are.  Aren't they pretty?  I think so too, but they needed one more step...

Photobucket

Photobucket

I painted some Glossy Accents on the tips of each petal and then shook on some Diamond Dust.  They now have a 'sugared' look, so very cool!

Photobucket

Photobucket

These are so fun to make, and I will be doing more!  This set is in my Etsy Shop and the sale will be going to my 3day walk fundraiser  ;)

Photobucket